How to Resize Images Without Losing Quality: A Complete 2026 Guide
Every time you resize an image, you risk introducing blur, pixelation, or distortion if the wrong method is used. Whether you are preparing product photos for an e-commerce store, optimizing blog graphics for faster load times, or exporting assets for social media, the method you choose determines whether your image stays sharp or comes out looking degraded.
This guide covers exactly how to resize images without losing quality: which resampling algorithms to use, how to maintain your resize image aspect ratio correctly, when upscaling is viable, and how MeloTools makes all of this possible directly in your browser.
Why Does Image Quality Degrade When You Resize?
When you resize a digital image, the software needs to recalculate the color value of every pixel in the new dimensions. This process is called resampling. A poorly executed resample blends neighboring pixels incorrectly, resulting in visible softness, artifacts, or distortion.
Three common causes of quality loss during resizing:
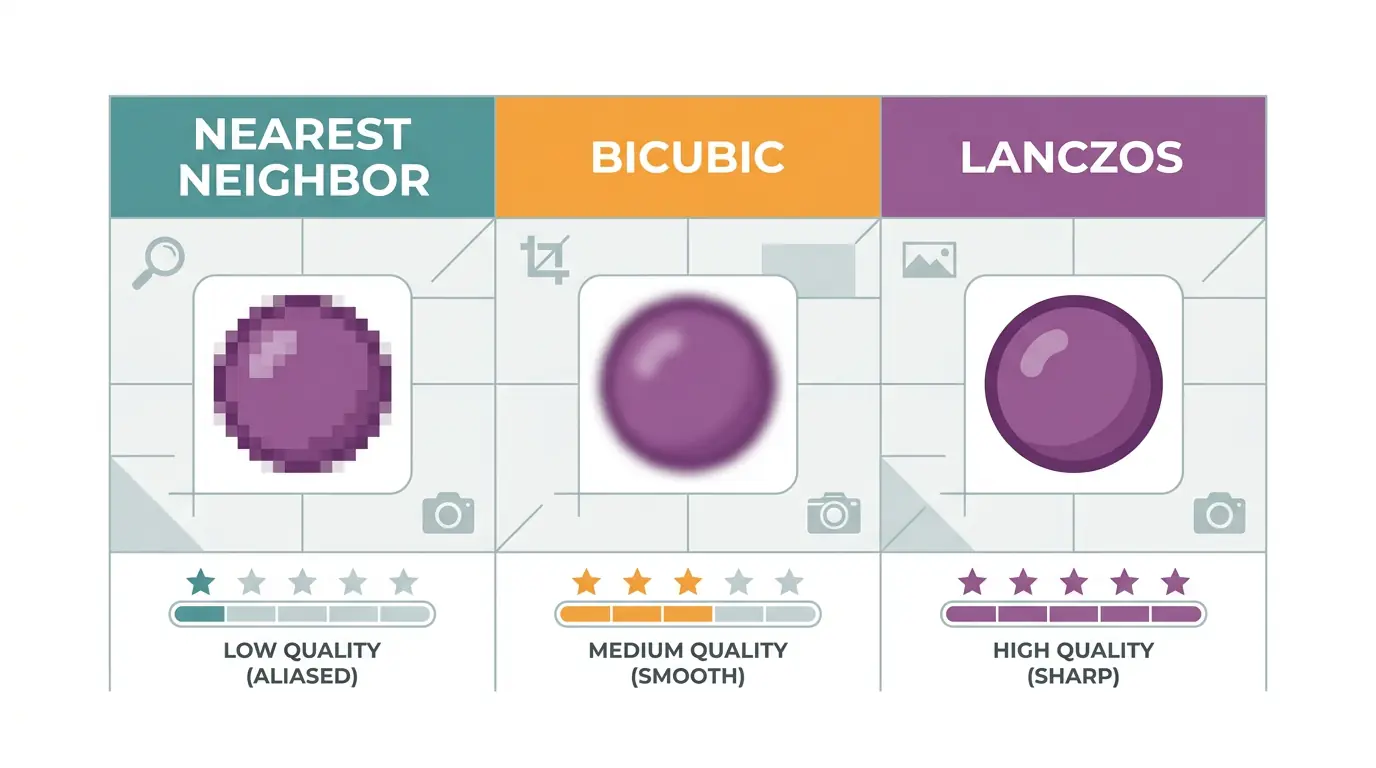
Nearest-neighbor resampling: The fastest method, but it produces blocky, pixelated results because it copies the closest pixel without blending. Suitable only for pixel art.
Incorrect aspect ratio: Stretching or squashing an image to fit a dimension it was not designed for introduces distortion that no algorithm can correct after the fact.
Over-upscaling without AI enhancement: Enlarging a small image forces the software to invent pixel data it does not have. Without intelligent interpolation, the result looks blurry or smeared.
Understanding these failure points is the first step toward consistently high image resizing quality.
Bicubic vs Lanczos Resampling: Which One Should You Use?
The resampling algorithm is the single most important decision in quality-preserving resizing. Two algorithms dominate professional image workflows: bicubic and Lanczos. Here is how they compare.
Bicubic Resampling
Bicubic resampling calculates new pixel values by sampling a 4x4 grid of surrounding pixels and applying a weighted cubic function. It produces smooth transitions and natural-looking results for photographic content.
There are two variants to know:
Bicubic Sharper is optimized for downscaling. It applies additional sharpening during the reduction process, which helps photographic images retain detail when displayed at smaller sizes.
Bicubic Smoother is optimized for upscaling. It softens the interpolation to avoid the harshness that standard bicubic can introduce when enlarging.
Bicubic is the industry default in tools like Adobe Photoshop and is well-suited for most general resizing workflows.
Lanczos Resampling
Lanczos uses a sinc function applied over a wider sampling window, typically including a 6x6 or 8x8 pixel neighborhood. This wider sampling makes it exceptionally good at preserving fine detail, edge sharpness, and texture during both upscaling and downscaling.
In direct comparisons of bicubic vs Lanczos resampling, Lanczos consistently produces sharper results for images with text, fine lines, product details, or architectural photographs. The tradeoff is that it is computationally heavier and can introduce minor ringing artifacts around very high-contrast edges if applied at extreme magnifications.
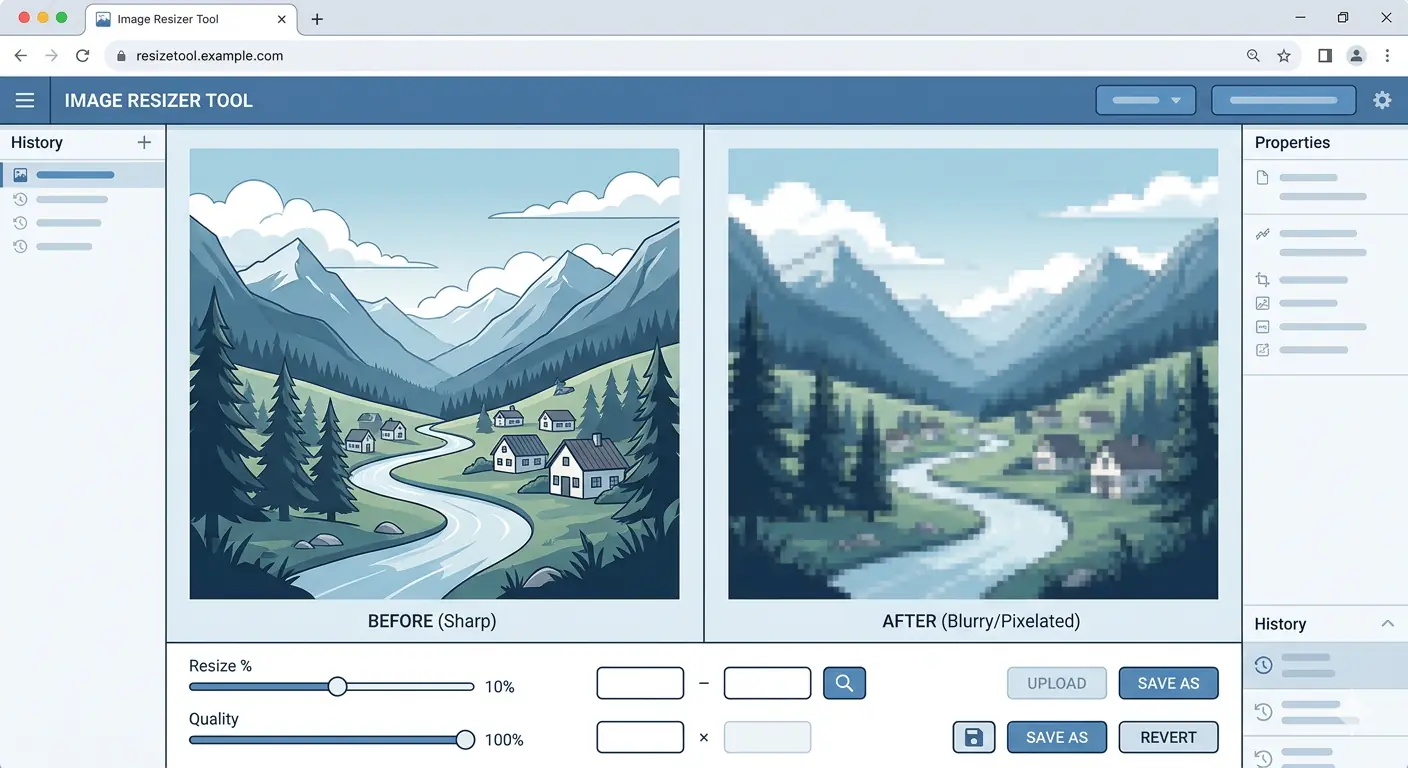
Which to choose: For photographs and general web images, bicubic sharper (downscaling) or bicubic smoother (upscaling) delivers reliable results. For product images, logos with transparent backgrounds, or any content with fine detail, Lanczos is the better choice. MeloTools applies Lanczos-quality interpolation in its browser-based image resizer tool, ensuring your output retains maximum sharpness without requiring manual algorithm selection.
How to Maintain the Correct Resize Image Aspect Ratio
Aspect ratio is the proportional relationship between an image's width and height. Resizing without locking the aspect ratio distorts the image in ways that cannot be recovered.
Common aspect ratios you will encounter:
| Aspect Ratio | Common Use Case |
|---|---|
| 16:9 | YouTube thumbnails, hero banners, presentations |
| 4:3 | Standard web images, blog graphics |
| 1:1 | Social media profile images, Instagram posts |
| 3:2 | DSLR photography, product shots |
| 2:3 | Pinterest, portrait-oriented mobile content |
The safest approach when resizing is to lock the aspect ratio before entering new dimensions. Enter either the target width or target height, and let the tool calculate the other dimension automatically.
When resizing for a specific canvas size that does not match the original aspect ratio (for example, fitting a 4:3 image into a 16:9 banner), the options are:
Letterboxing: Add padding on two sides to fill the target canvas without cropping or stretching. Cropping to fit: Trim the image edges to match the target ratio while preserving proportions within the crop. Content-aware scaling: In advanced workflows, this identifies low-information areas to compress while preserving the main subject.
MeloTools image conversion tools include aspect ratio locking by default. When you enter a new width, the height adjusts automatically, removing one of the most frequent sources of resize errors in manual workflows.
Upscaling Images: When It Works and When It Does Not
Upscaling refers to increasing an image's pixel dimensions beyond its original size. This is one of the most challenging operations in image processing because the software must generate pixel data that did not originally exist.
Traditional Upscaling
Traditional algorithms like bicubic smoother and Lanczos produce acceptable results when upscaling by small amounts, typically up to 1.5x or 2x the original size. Beyond that, quality degrades noticeably because the resampling window runs out of genuine pixel data to reference.
If you regularly need to upscale image quality for print or large-format display, start with the highest resolution source file available. Even a modest increase in source resolution produces significantly better results than trying to recover quality from a highly compressed small file.
AI-Powered Upscaling
AI upscaling tools use neural networks trained on millions of image pairs to reconstruct plausible high-resolution detail from low-resolution inputs. These models predict what fine textures, edges, and patterns should look like at larger sizes, rather than simply interpolating between existing pixels.
The practical outcome is that AI upscaling can enlarge images by 4x or more while preserving perceptible sharpness. This makes it viable for:
- Recovering usable resolution from archival or compressed images
- Enlarging product thumbnails for print marketing
- Preparing older web images for retina or 4K displays
MeloTools is actively expanding its image enhancement capabilities. In the meantime, the image compression tool and resizer together let you prepare images at the correct output size before applying any further enhancement, which reduces the degree of upscaling needed and improves your starting quality.
A Step-by-Step Workflow for Resizing Without Quality Loss
Following a consistent process removes guesswork and produces repeatable results across every image in your library.
Step 1: Start with the highest quality source file. Never resize a compressed JPEG multiple times. Each save cycle in a lossy format compounds quality loss. Work from your original RAW, PNG, or highest-quality JPEG at all times.
Step 2: Determine your target dimensions before opening the tool. Know the exact pixel dimensions or percentage reduction you need. Resizing twice to correct an error introduces unnecessary compression cycles.
Step 3: Lock your aspect ratio. Confirm that proportional scaling is enabled before entering any new dimension values.
Step 4: Select the correct resampling method. Use Lanczos or bicubic sharper for downscaling. Use bicubic smoother or an AI-enhanced method for upscaling.
Step 5: Export in the right format. For web use, WebP is the recommended output format in 2026 because it combines strong compression with high visual quality. The MeloTools PNG to WebP converter handles this step without any server uploads, keeping your files completely private.
Step 6: Validate the output visually. Zoom into edge areas, fine text, and high-contrast regions at 100% zoom before committing to the resized file.
Common Image Resizing Mistakes to Avoid
Even experienced users make these errors. Recognizing them in advance prevents quality issues before they reach production.
Resizing in the wrong order: Always resize before compressing, not after. If you compress first and then resize, you amplify compression artifacts that were previously hidden.
Using browser-native CSS scaling as a substitute for actual resizing: Setting an image to width: 100% in CSS does not reduce the file size or improve rendering quality for display. The full-resolution file still downloads. Always resize to your actual display dimensions.
Ignoring DPI settings for print: Web images are typically 72 DPI. Print materials require 300 DPI minimum. Resizing a 72 DPI web image for print without adjusting DPI produces blurred physical output regardless of how good the digital preview looks.
Saving to JPEG after resizing for further editing: If you plan to make additional edits, save intermediate versions as PNG to avoid generational quality loss from repeated JPEG compression cycles.
How MeloTools Preserves Quality During Resizing
MeloTools processes all image resizing entirely within your browser. No file leaves your device. This browser-based approach means:
- Zero upload wait time, even for large files
- Full privacy for client images, proprietary assets, and confidential content
- No server-side compression artifacts introduced during transmission
- Consistent output quality regardless of your network connection
The tool applies high-quality interpolation during the resize operation, locks aspect ratios automatically, and outputs in your chosen format without any hidden re-compression steps. For teams managing large image libraries, MeloTools also supports batch image compression to handle multiple files in a single session.
For a broader understanding of how resizing fits into a complete optimization workflow, the MeloTools guide on image compression without quality loss covers the full pipeline from raw file to web-ready output.
Frequently Asked Questions
What is the best algorithm to resize images without losing quality? Lanczos resampling delivers the sharpest results for most use cases, particularly for images with fine detail, text, or product photography. For general photographic content being reduced in size, bicubic sharper is a reliable and widely supported alternative. Both outperform nearest-neighbor resizing, which produces pixelated results. MeloTools applies high-quality interpolation automatically, removing the need to select an algorithm manually.
Does resizing an image reduce its file size? Reducing pixel dimensions almost always reduces file size because there are fewer pixels to store. However, the relationship is not perfectly linear. A 50% reduction in width and height reduces total pixel count by 75%, which translates to a significant file size reduction. The exact savings depend on the image format, content complexity, and whether additional compression is applied after resizing.
Can I upscale an image without losing quality? Traditional upscaling methods like bicubic smoothing work acceptably for small enlargements of up to 1.5x to 2x. Beyond that, AI-powered upscaling tools produce visibly better results because they reconstruct plausible detail rather than interpolating between sparse data points. Starting from the highest available source resolution always produces better upscaled output than trying to recover quality from a heavily compressed small image.
How do I resize an image without distorting it? Lock the aspect ratio before entering any new dimension. Enter either the target width or height, and let the tool calculate the other value automatically. If the target canvas has a different aspect ratio than the original image, use letterboxing or cropping rather than stretching. Stretching an image to fit mismatched dimensions produces distortion that resampling cannot correct.
What format should I save a resized image in for the web? WebP is the recommended format for resized web images in 2026. It delivers smaller file sizes than JPEG and PNG at equivalent visual quality, and browser support is universal. If transparency is required, WebP lossless or PNG are both suitable. Avoid saving resized images as JPEG if you plan any further editing, as repeated JPEG saves compound quality loss.
Does CSS resizing affect actual image quality? CSS scaling changes how an image is displayed on screen but does not resize the actual file. A 4000px image scaled down with CSS still downloads at full resolution. This wastes bandwidth and slows page load without improving rendering quality. Always resize images to your actual display dimensions and let CSS handle minor layout adjustments only.